We all know that nowadays, content creation is king, and subscribers are your loyal subjects. But let’s be honest, captivating visuals alone won’t cut it. Editors at timesstandard mentioned that in order to truly stand out in this saturated digital landscape, you need audio that not only grabs attention but keeps viewers hooked from start to finish.
That’s why we’re here today – to share some expert tips on how to enhance the audio quality of your YouTube videos once you’ve gained a strong following by buying YouTube subscribers. So, without further ado, let’s get started.
Invest in a Quality Microphone
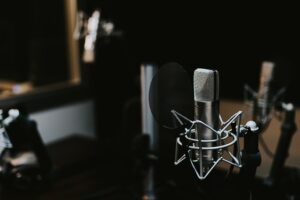 A dedicated external microphone not only improves audio clarity but also helps reduce background noise and echo. There are various options available to suit different budgets and needs, ranging from USB microphones perfect for solo creators to XLR microphones preferred by professionals. When choosing a microphone, consider factors such as its frequency response, polar pattern, and sensitivity. A wider frequency response ensures that all nuances of your voice are captured accurately. Polar patterns like cardioid or shotgun help minimize unwanted noise from the sides or rear of the mic. And sensitivity determines how well the microphone picks up sound from different distances.
Eliminate Background Noise
How can we get rid of any background noise that can be a major distraction in your YouTube videos? Let’s explore some effective tips. Choosing a room with minimal outside noise or finding a time of day when there is less activity around you should be your first step. Remember, the quieter the environment, the easier it will be to capture clear audio. Aside from that, consider using acoustic treatment in your recording space. Sound-absorbing materials like foam panels or curtains can help reduce echo and reverberation, resulting in cleaner sound recordings.
Use Pop Filters and Windshields
These simple yet effective tools help reduce unwanted noises and improve the overall clarity of your audio. Pop filters are screens that are placed in front of the microphone to prevent plosive sounds caused by consonants like “p” and “b.” By diffusing these bursts of air, pop filters can minimize distortions and ensure a cleaner recording. On the other hand, windshields are foam or furry coverings that wrap around microphones to reduce wind noise when filming outdoors. They act as a barrier against gusts of wind that can disrupt your audio, allowing you to capture clear sound even on blustery days. Just be sure to look for ones specifically designed for your microphone model to ensure proper fit and optimal results.
Rock Your Post-Production Audio Enhancement
 Once you’ve captured your audio, the real magic happens in post-production. This is where you can take your sound quality to the next level and truly make your videos shine. Here are some tips to rock your post-production audio enhancement. Invest in good audio editing software. In the software, you’ll see a wide range of different tools, such as equalizers, compressors, and noise-reduction plugins. So, find what works best for your content. Next, pay close attention to levels and balance. Make sure all elements of your audio – voiceover, music, and effects – are properly mixed so they complement each other without overpowering or being drowned out. It’s also a good idea to utilize effects strategically for added impact.
Now, what’s left for you is to put these tips into action. Make the necessary adjustments to enhance your audio quality. Whether you’re a vlogger, educator, or entertainer on YouTube, taking these steps will help ensure that your message is heard loud and clear.